Migrating Your Inbox from Microsoft 365 to Proton
This is where data actually moves. Post 3 got Proton set up on your custom domain and your DNS records trusted; this post is the cutover itself - pulling mail across from M365. If you’ve arrived here from a search engine, note that the earlier posts aren’t prerequisites if you already have Proton on a custom domain with MX records created but not yet live.
Before you start
So far, your incoming email should have started appearing in your Proton mailbox, and you should have been able to send emails from Proton as well. Let’s just double-check you have everything in place.
Your domain’s nameservers are pointing to Cloudflare. In your Cloudflare Domain Records dashboard, you should have the following DNS records (at a minimum). Where you see “XXX”, check your Proton/M365 domains setup for your domain-specific values. TTL should all be set to Auto.
| Record Type | Service | Host | Target | Priority |
|---|---|---|---|---|
| CNAME | Proton | protonmail._domainkey | protonmail.domainkey.XXX.domains.proton.ch | |
| CNAME | Proton | protonmail2._domainkey | protonmail2.domainkey.XXX.domains.proton.ch | |
| CNAME | Proton | protonmail3._domainkey | protonmail3.domainkey.XXX.domains.proton.ch | |
| CNAME | M365 | selector1._domainkey | selector1-XXX._domainkey.XXX.onmicrosoft.com | |
| CNAME | M365 | selector2._domainkey | selector2-XXX._domainkey.XXX.onmicrosoft.com | |
| MX | Proton | @ | mail.protonmail.ch | 10 |
| MX | Proton | @ | mailsec.protonmail.ch | 20 |
| MX | M365 | @ | XXX.mail.protection.outlook.com | 25 |
| TXT | All | _dmarc | v=DMARC1; p=quarantine; pct=100; sp=none; aspf=r; (see previous post for DMARC record info) | |
| TXT | All | @ | “v=spf1 include:_spf.protonmail.ch include:spf.protection.outlook.com ~all” | |
| TXT | Proton | @ | “protonmail-verification=XXX” |
If you’re happy that you can send and receive mails with Proton, let’s proceed with the data migration. If anything is missing, go back to Post 3.
Note: If you decided in the last step to keep M365 mail servers with a higher priority than Proton, you will need to fix that before going any further, and wait at least as long as the maximum TTL on all 3 MX records before going to the next step. This will ensure that all your incoming mails are routing to Proton, and that the migration from M365 is not a moving target.
Important: Not every piece of metadata from Outlook will carry over. Read the What didn’t carry over below before running your import - some things are easier to capture from M365 before you flip the switch than to reconstruct after.
Importing with Easy Switch
Note: If you have more than one user in your M365 tenant, each user will need to run Easy Switch from their own Proton account, after the M365 Tenant Admin has granted access to the Easy Switch app across the tenant (which is covered in this post). Also, this import mechanism is designed for standard user mailboxes, not shared mailboxes. More on that in the next post.
Proton have created an import tool which does not require you to export PSTs. Easy Switch connects to Google, Yahoo, Outlook/M365 or any other IMAP provider. Before you begin, if you are planning to import your messages and maintain the same folder structure as M365, you need to create the folders in your Proton mailbox before you start your import.
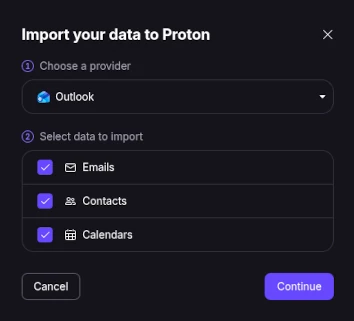
To access it, go to Settings → Import via Easy Switch. Click the Outlook icon, ensure Outlook is chosen as a provider, with your Email, Contacts and Calendar selected for import. Click Continue.
Enter the email address of the first mailbox that you wish to port across and click Next.

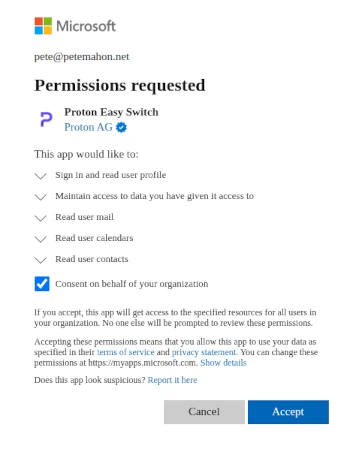
The next screen is where the M365 Tenant Admin logs in and grants “Consent on behalf of your organization”. Be sure to tick the box if you have more than one user who will need to perform the same action. Click Accept.
There are a few decisions to make as you migrate your information.
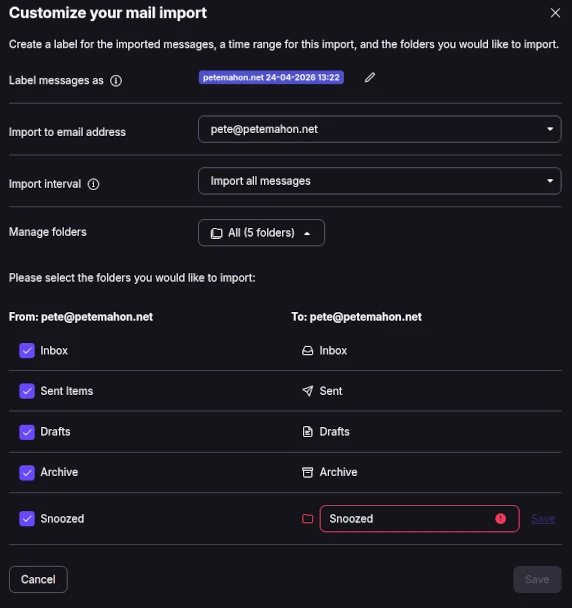
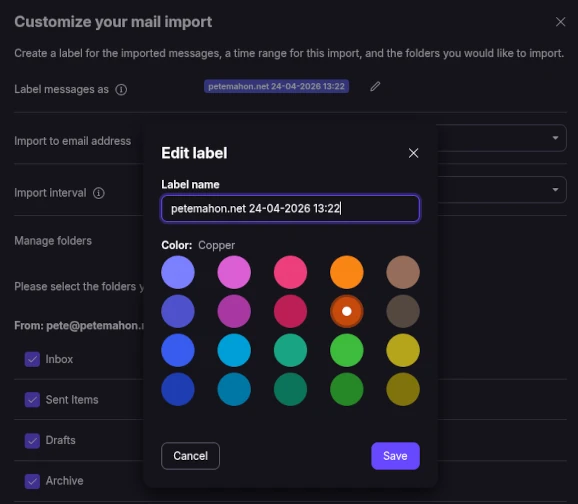
- Choose a label to be applied to all your imported messages. Apart from the usefulness of the visual impact of your migrated data being clearly identifiable, it allows Proton to ensure a clean rollback in case something fails.
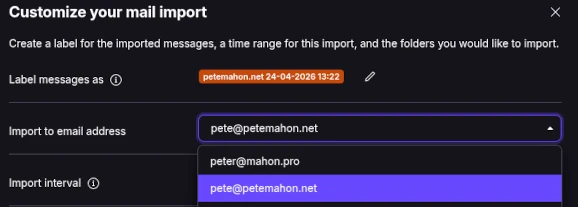
- Even if you only have one mailbox, you still need to map your imported emails to one of your Proton email addresses. I am not sure what this choice actually does, as the import retained all of my catch-all addresses to which old emails were addressed. There isn’t any further information offered on the Proton site in this regard. Anyway, safe to leave this at the default.
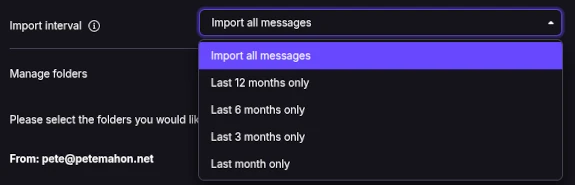
- Choose the time period to import. I imported all my messages. However, if you want to do a short test, you could choose last month’s messages and rollback if needed. This all happens directly between Proton and M365, so there is no concern if your bandwidth is constrained.
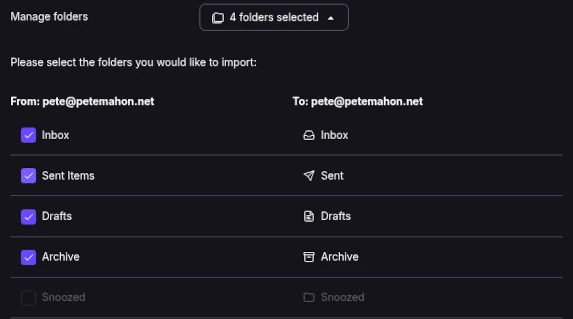
- Choose the mailbox folders you wish to transfer from M365. Core folders like Inbox, Archive, Sent and Drafts are locked down and will map 1-to-1. Some of the M365/Outlook/Teams/Skype specific folders I chose to delete before migration, like Sync Errors, Conversation History etc. Any additional folders you have can be mapped as desired. Some folders, like Snoozed, cannot be deleted from M365 so I de-selected these from the import.
- Contacts import is straightforward, and didn’t need any customisation. All contacts in my email were selected for migration. If you have more than 10,000 contacts, I would suggest these be exported into a CSV and re-imported to Proton manually.
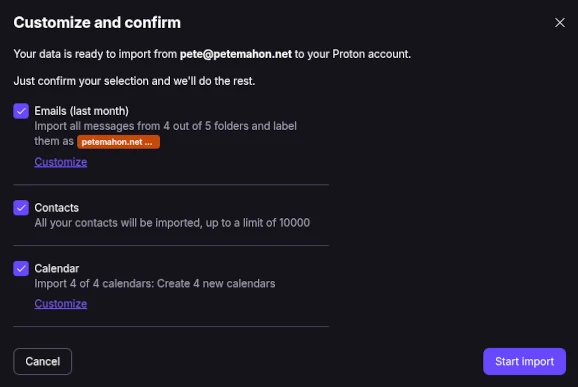
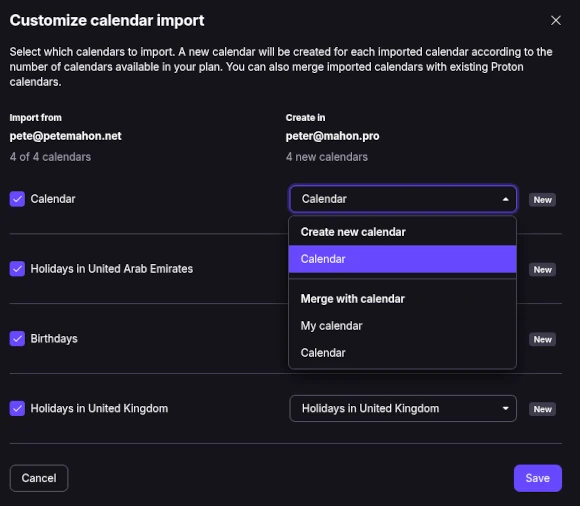
Proton has a default calendar. It’s important to note here that in order to not create a new, separate calendar, you need to select the Merge option in this step. If you accidentally import the data and create a new calendar, there is no out-of-the-box feature to merge your calendars in Proton at a later stage.
There is a valid reason for wanting two calendars; Proton allows you to set different defaults per Calendar:
- Duration
- Notification time before the event
- Notification method - Email/Push
Note: If you accidentally create a second calendar, go to Settings → Import and Export and Export all events from the unwanted calendar to an ICS file, re-import to the correct calendar, and delete the unwanted calendar.
Running the import in the background
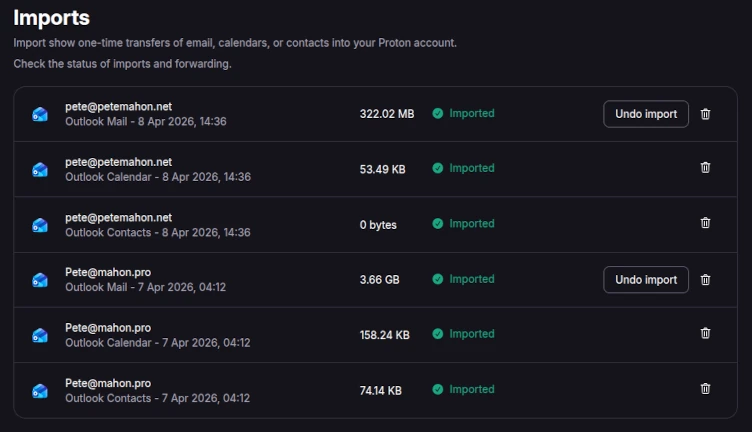
Easy Switch runs on Proton’s infrastructure, not your browser. The import will run as a background job, and you can leave the application to do its magic at this point. Once each section of each import is completed (Mail, Calendar, Contacts), you will get an email notification in your Proton mailbox.
That’s it! If something goes wrong at this stage, you can use the buttons in the Import via Easy Switch screen to undo the import.
Setting up domain-based filters
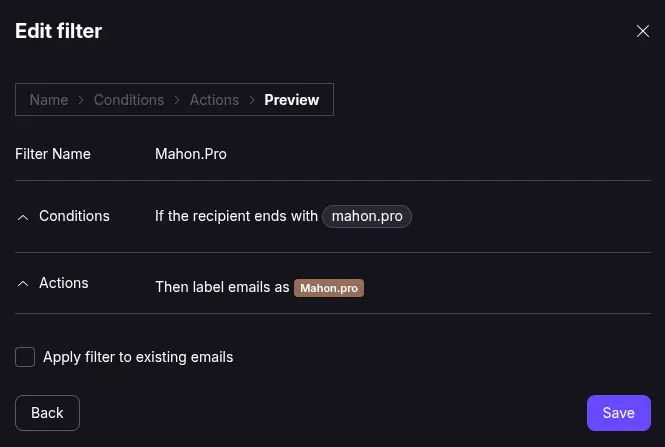
Once mail from both your domains is sitting in Proton, you’ll likely want filters that automatically label future incoming mail by recipient domain - the same visual partition the import labels gave you, but ongoing.
Open Settings → Filters → Add filter: the condition (recipient address contains @yourdomain.com), the action (apply label YourDomain.com). This filtering and labelling combines with your per-domain catch-all(s), so every alias gets caught regardless of which address the sender used. Create one filter per domain.
Calendar housekeeping after import
Easy Switch brings calendar events across, but a few things need manual attention afterwards.
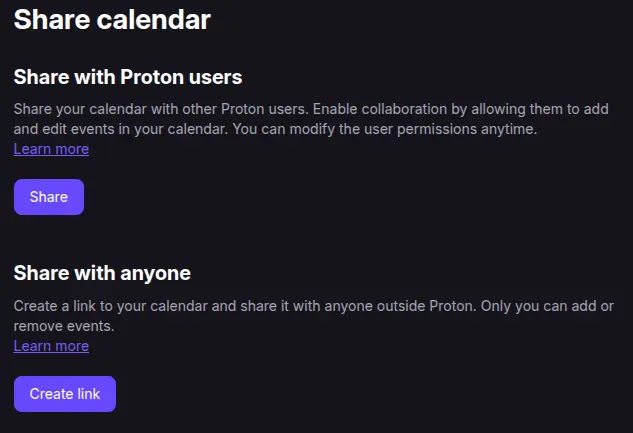
Calendar shares - If you shared your M365 calendar, this doesn’t get auto-migrated; you’ll need to re-share under Settings → Calendars → Calendar Name → Share.
If you only need to share “View” permissions for your calendar, Proton lets you “Create link” as in the image below. However, to share edit access, or to share view access only with a specific authenticated user, you can only share with a Proton user. This aligns with the M365 model.
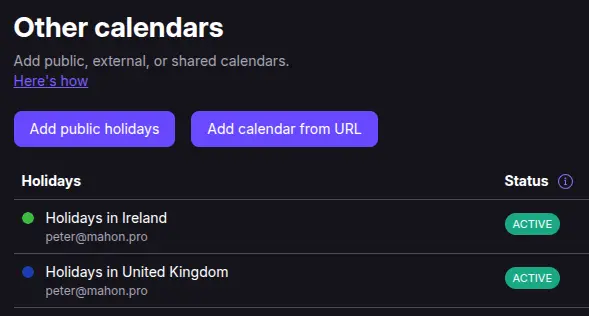
External calendar subscriptions - ICS feeds for sports fixtures, public holidays, work calendars from other tenants and any other additional calendars will need to be added again under Settings → Calendars → Add calendar from URL.
Tiny gripe - Proton doesn’t have public holidays for every country just yet.
- In-flight RSVPs - Invitations that arrived in M365 between MX cutover and the Easy Switch import. If you followed the guides in this article series the propagation gap should be small, but it’s worth checking the old mailbox for invites you accepted that haven’t surfaced on the Proton calendar yet. You can always run another calendar-only import to pull anything from the past week if needed.
What didn’t carry over
Easy Switch is good, but not “lossless” if you have extensively used features in Outlook. This is worth knowing before you start hunting for elements that you assumed would be there:
Outlook categories - The colour-coded category model has no Proton equivalent and is stripped on import. Labels are the closest thing; rebuild manually if you relied on categories.
Follow-up flags - These become stars in Proton, but the date-based reminder element doesn’t carry across. Starred messages are accessible using the Starred “folder” in the left-hand side navigation pane.
Custom contact fields - Anything beyond the standard vCard schema (custom phone-type labels, additional notes fields) may be missing. Spot-check a handful of contacts after import.
Calendar event colours - If you had colour-coded events in Outlook for personal/work distinction, those colours don’t transfer. Re-colour, or split into separate calendars in Proton. If you’re fairly techy, you can export all your events from M365 in an ICS file, and do some manual separation using a plain text editor to create two calendar files for import. Create the different calendars in Proton first, then import as needed.
Outlook rules - These don’t translate to Proton filters automatically. List the important ones before cutover and rebuild them in Proton (the domain-based filter above is a good starting point).
Monitoring the first 48 hours
Key things to check in the first couple of days:
- Check SPF and DKIM results for your outgoing mails
- Contact some of your recipients and see if your Proton emails have ended up in Quarantine or Junk/Spam
- Check the M365 mailbox to ensure no new email is going there; this could still happen if a mail server is receiving cached DNS entries for your domain.
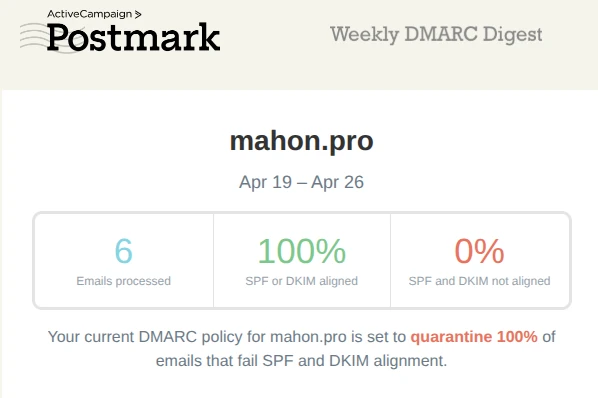
If you signed up to Postmark, after a week, and each week thereafter, you will receive your first digest for each domain registered.
The header tells you at a glance how many mails were recorded as being sent by your domain (this may not be 100% accurate if the recipient mail server is not compliant with DMARC standards). The number in the middle is the important one. Anything less than 100% is worth a closer look.
If you wanted to delve further into the detail, each source of your email is then listed in the body below. If you were continuing to send from M365, and perhaps used another system to send emails from your domain, these would show up in the Your sources section:
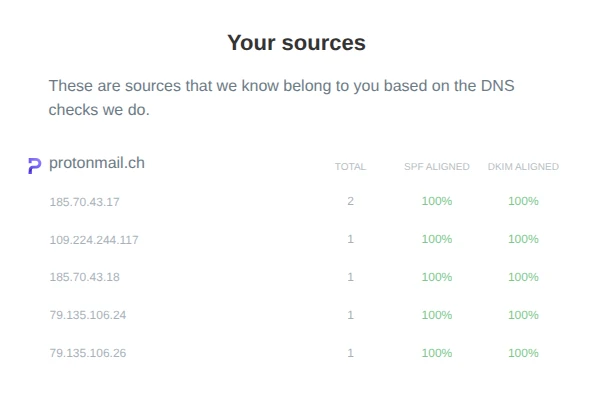
Knowing which servers are sending emails on your behalf can help to surface some old systems that you forgot to switch off, or even expose shadow IT in your organisation.
What to do with the old M365 mailbox(es) - tidying up
So Proton is set up, MX records point at it, and mail for you@yourdomain.com now lands in your Proton inbox. The Microsoft tenant still thinks it owns your domain and the mailboxes still exist, but no new mail is arriving because DNS has moved on.
You have a decision to make.
Your domain is not at stake. The domain is registered in your name at your registrar, and as long as you keep renewing it you control where mail for it goes - Microsoft, Proton, or anywhere else. The question is purely what to do with the tenant and the historical data sitting inside it.
Important - read this before continuing
If you wish to continue the migration and move across Shared Mailboxes, OneDrive or SharePoint data, keep the following steps handy to come back to later. We will link back to this in a later post also.
Option 1: Downgrade to the cheapest viable plan and keep it as a warm archive. If you’re on Business Standard or Premium, there’s no reason to keep paying for Office desktop apps you no longer use.
Convert all mailboxes to Shared Mailboxes with the exception of one.
Drop to Exchange Online Plan 1 and assign to just the remaining user mailbox.
At the time of writing it’s around $4 per user per month, with a 50GB mailbox and nothing else. You can buy Exchange Online Plan 1 as a standalone service rather than as part of a full Microsoft 365 plan, which is the relevant trick here. The tenant stays alive, the historical mailbox stays searchable via Outlook on the web, and if Proton ever turns out to be the wrong choice you can flip MX records back in an afternoon.
The cost is roughly $48 a year to preserve all the mailboxes in your tenant.
It might be worth it as a six-month safety net but wouldn’t be a viable permanent state.
Option 2: Cancel everything and remove the domain from the tenant. This is the proper midpoint.
Cancel all paid subscriptions, but before the tenant goes dormant, do the cleanup
Change every user’s UPN back to the *.onmicrosoft.com default
Strip the custom domain from any aliases, distribution lists, and group addresses
Remove the domain from the tenant under Settings → Domains. The domain removal will be blocked until all dependencies are cleared.
Skipping this step is the single most common way people regret their migration months later - a domain which is stuck “verified” in an abandoned tenant. Once the domain is detached, your domain can be pointed anywhere without Microsoft having any claim on it. Mailbox contents will be irrevocably lost when subscriptions end (typically a 30-day grace period), so export anything you want to keep first.
Option 3: Full tenant deletion - the cleanest break. Same prep as Option 2 - change UPNs, remove aliases, detach the custom domain - then walk through the formal close-tenant flow. The only thing you lose is the historical mailboxes and OneDrive/SharePoint, so the question is really about whether you’ve got a satisfactory archive elsewhere. If you exported your mail to a PST or an .mbox during migration, or if Proton imported the lot, you’ve already got everything you’ll plausibly want. If you didn’t, do that before pulling the plug.
Option 4: Cancel paid subscriptions, purge the data, but leave the domain bound to the tenant for Entra ID / Azure SSO.
This is a hybrid of Options 2 and 3 for a specific use case: you’re done with M365 as a productivity suite, but you’re using Entra ID (the artist formerly known as Azure AD) as an identity provider for third-party apps - SAML or OIDC federation into things like GitHub, Atlassian, Tableau, or anything else you’ve wired up to Entra, or any apps you’ve published. Detaching the domain breaks the SSO; the domain-to-tenant binding is what makes those user identities recognisable to the federated apps.
The work required:
- Export anything you want to keep from mailboxes, OneDrive, and SharePoint (coming in a later post)
- Delete all mailboxes (or convert to shared, then delete) so that Exchange has no remaining references to your domain
- Remove the custom domain from any distribution lists, Microsoft 365 groups, and aliases
- Cancel all paid subscriptions
- Leave the custom domain verified in the tenant - do not remove it under Settings → Domains
- Keep at least one user account active with a UPN on your custom domain to act as the global admin, and sign in to it occasionally to keep the tenant from going dormant
What you’re left with is an Entra ID Free tenant. It costs nothing to maintain, your custom domain stays bound to it, and basic SAML/OIDC federation into third-party apps continues to work. You lose Conditional Access, the more advanced MFA policies, and most of the governance features - those all sit behind Entra ID P1 or P2 - but day-to-day “log into app X with my domain identity” does not need anything paid.
The warning from Option 2 applies in reverse here: be deliberate about what you remove during cleanup. If you accidentally strip the domain off the tenant, you’ve just broken your SSO, and re-attaching it means re-verifying via DNS and reconfiguring every federated app’s claim mappings. Cancel subscriptions and purge data, but leave the domain attachment alone.
The trap in Options 1, 2 and 3 is forgetting that a custom domain attached to an M365 tenant is sticky by design. Microsoft assumes you want it there. Letting a subscription lapse without proactively removing the domain leaves you with a verified-but-orphaned domain in a deactivating tenant, and untangling that later means support tickets. So, whichever option you pick, make the domain decision deliberately, and on your timeline, rather than letting Microsoft make it for you by default.
If you have chosen to deactivate your tenant entirely (Options 2 or 3), remember to remove ALL Microsoft DNS settings from Cloudflare. This prevents anyone else spinning up a new Microsoft tenant with your domain name. If you’ve gone with Option 4, leave the domain-verification TXT record in place.
My choice
Option 2 for now, transitioning to Option 4 once I’ve purged the data. I want the safety net while I’m certain Proton’s the right move, and the SSO use case kicks in later.
Next steps
The next post talks about a rather common scenario - Shared Mailbox migration.